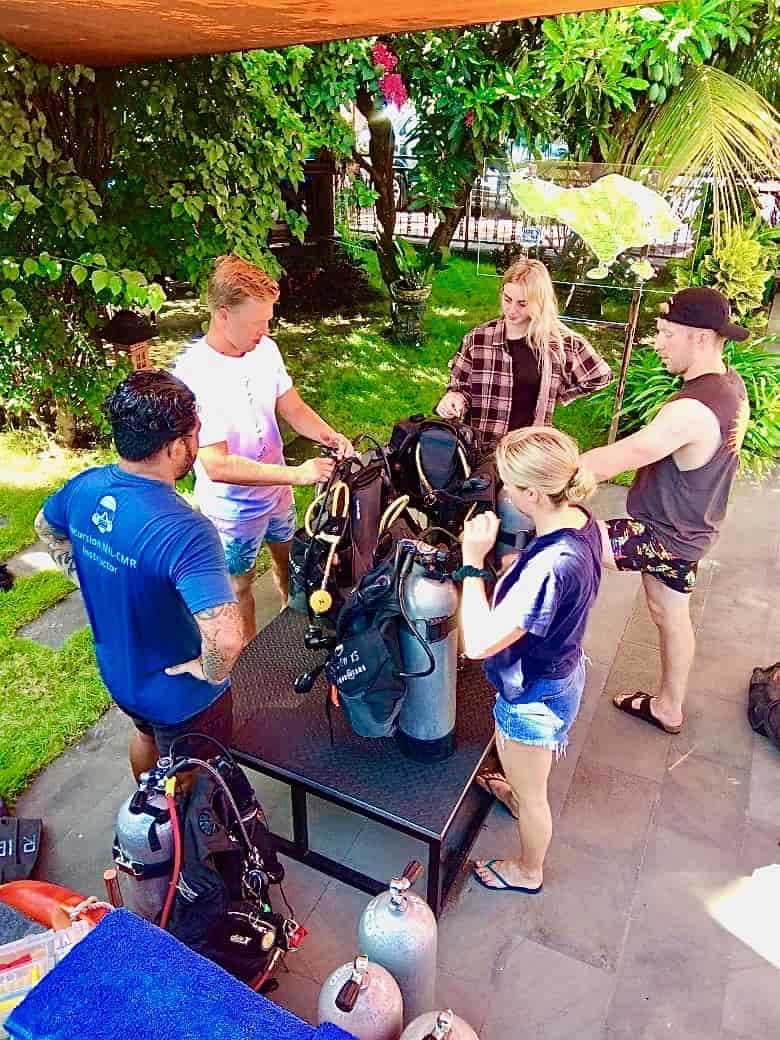
08 May Rescue and EFR course at Joe’s Gone Diving
Many people have done it before me and many people will do it after me. The PADI Rescue and EFR (First Aid) Course. After your PADI Advanced Course, it is possible to continue on the PADI ladder and certify yourself as a Rescue diver. There are 3 tough days ahead with a half-day first aid course with both theory and practical exercises + exams and a two-day Rescue Course with both theory and practical exercises + an exam. For me this was the most educational Course so far.
It all starts with your first aid course. After watching videos, which many of you probably know, and making the questions from the book, an exam has to be done. This exam is divided into 2 exams. The first exam, which consists of 30 questions, is about first aid, also called primary care. Here you learn what to do when you meet someone or when you see someone who urgently needs first aid. The second exam is about helping someone when the situation is not life threatening. You call that secondary care. I will not write too much about it, because yes, maybe you need to do the exam one time!
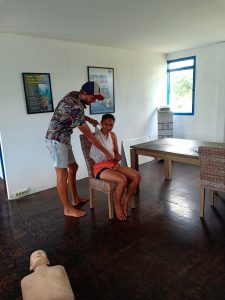
The other part of your first aid course is the practical part. This is also divided into primary care and secondary care. You are now going to put into practice what you have learned in theory. You do everything according to the AB / CABS method. I’ll explain a little bit. The A stands for “Assess the situation”. What you need to do is see what happened at the site of the ‘accident’ and whether it is safe for you to help the person, because the first rule you learn during your first aid course is that you must be safe before you can help someone else. The patient is already in the worst situation possible and will regret it if something happens to you. The A also stands for “Airway open”. As a first aid, you must ensure that the airways are open so that you can check whether the patient is still breathing. The B stands for “Breathing”. Place your ear close to the mouth and nose and look at the patient’s chest for 10 seconds. When the patient doesn’t breathe you start with CAB. CAB is divided into 3 parts. The C stands for “Chest Compressions, do that 30 times. Then check the A that stands for ” Open Airway” and give 2x B, which stands for “Rescue Breaths”. Keep repeating this until the emergency services are present or there is a defibrillator. The S stands for 3 things: Serious Bleeding, Shock, Spinal injury. In the course itself you will learn what to do exactly when this is the case with a patient.
In the practical part you learn CPR according to the AB / CABS method, but you also learn to apply bandage and what to do when a diver or another person has a broken leg or arm. A very educational course that will benefit you all your life. I would recommend doing a refresher course now and then.
After completing your EFR Course you can start with the PADI Rescue Course. As you might already expect, the Course starts with, yes there they are again, watching videos. After viewing this, you answer the questions from the book and then do the exam. You can do everything in one morning. In the afternoon it was time to go into the swimming pool. First you do all the self-rescue exercises how you can save yourself, which is very useful, and you have already learned this partly in your Open Water Course. After doing this, we started to do exercises to rescue people. It started easy with a diver who was tired. What you have to do is to calm the diver down and ask if you can help him / her, you always do this by the way. You should always ask if you can help the diver. Even if he is not breathing, you always ask. You can do this by using the following sentence. “Diver, my name is … I am a rescue diver, can I help you? When someone is not breathing you can assume that he wants to be helped. You can reassure a diver who is tired and let him / her inflate the BDC to the maximum. Then you can drag the diver back to the boat or the shore.
Another scenario you get is a diver who is panicking. This diver will do anything to cling to something or to climb on something, including you as a rescue diver. When a diver is panicking you make sure you stay at a distance to approach the diver. You ask again if you can help the diver, but often there is no response. In my situation, the diver jumped on me, knocked the regulator out of my mouth and took off my diving mask. The only thing you can do then is to stay calm, push the panicked diver away from you or kick if necessary, to bring yourself back to safety. Because that is the first rule. Your safety is always your primary concern. After putting everything back in order, I dived underwater to remove the weight belt. Then you clamp your legs around the tank of the panicked diver and fully blow his / her BCD to create buoyancy. Then you keep talking to the diver that everything will be fine and you reassure the diver. I personally found this a tough exercise, because you do not quite know what to expect.
The final exercise is to rescue a diver who is no longer breathing. This is by far the most intense exercise. If you see a diver no longer moving underwater, check this by giving a few taps on his / her shoulder and check if the eyes are still moving. If this is not the case, you must ensure that the diver is brought to the surface. We learned that you do this by inflating both BCDs slowly and by swimming up very slowly. When the surface is reached, fully inflate both BCDs and remove both regulators and masks. Then you listen to see if the diver is breathing, if not, you shout to the nearest boat or person that the emergency services should be called. After this you give 2 rescue breaths. After the 2 rescue breaths, make sure you give 1 rescue breath every 5 seconds until you reach the boat or shore. In the meantime, you must ensure that both weight belts are removed and also both BCDs. This is the toughest of all. You have 1 hand free to do all this. The other hand is under the head of the diver. It is quite difficult to swim and get someone’s BCD out completely, knowing that you also have to think about giving a rescue breath every 5 seconds. Once at the boat or shore you do 2 rescue breaths and you have 30 seconds to get the diver onto the boat or the shore and then proceed with CPR. I was completely exhausted after this exercise and this was only in the pool. The next day Tulamben was on the program.
To be honest, I am not often nervous about something, but on this day I was nervous. It was the day of the unknown. Normally you are told what you are going to do in a day and an instruction is given per dive. This is different with rescue diving day 2. Everything can happen at any time and you have to anticipate every situation. This soon became clear when we arrived and we just put our wetsuits on. I did my Rescue Course with a Belgian man (Kurt) which made it a little easier because we could work together.
In the distance we heard a call for help followed by several ??. The adrenaline came up and there was full focus. We both ran to the beach with a rescue buoy under our arm. There was Disty, the intern at Joe’s Gone Diving. Kurt jumped into the water with the buoy and I held the end of the rope to drag Disty to the shore after Kurt rescued her. Luckily this all went well. The day had begun.
After this first scenario the BCDs were put on and it was time to go diving. Once underwater, the different situations followed rapidly. Divers with cramps, divers in panic, divers who took their masks off, everything happened. You had to be alert every second of the dive. The only thing we were told before the dive is that no exercises would be done deeper than 12 meters. When we arrived at a depth of 13.5 meters. I was quite relieved. We were able to enjoy the fish and the immense USAT Liberty Wreck. The enjoyment was over fairly quickly because the biggest exercise of all was yet to come. The diver at depth who was not breathing. Ismail informed me that Kurt would do the exercise first. Disty did not move anymore at a depth of about 7 meters. Kurt went to rescue her and did all this according to the book and it went very well for him. Time for lunch!
After lunch, which was appreciated by everyone, the second dive started. This dive was all about searching for missing divers underwater. You can do this in three different ways. In a circle pattern, a U pattern or in a square pattern. You will learn more about this in the Course itself. We did the U pattern to find Disty. With a compass you will bring the search to a successful conclusion. A few minutes later we found Disty and we went fun diving for 20 minutes. To be honest, it was nervous at the second dive, because I knew I had to save Disty. Even though it is a situation sketch, it seems real. The moment had arrived, Disty no longer moved. All the exercises and theory that I had learned came together. The tap on the shoulder, the BCD slowly inflating, listening to whether she was still breathing, calling in the emergency services, giving rescue breaths, weight belts off, BCDs off. Everything came together now. It was very hard, certainly because it was in the ocean and you have to deal with the conditions. I succeeded the first time and that was the Rescue Course. A proud feeling. Kurt and I had earned a delicious cold beer. It tasted great.
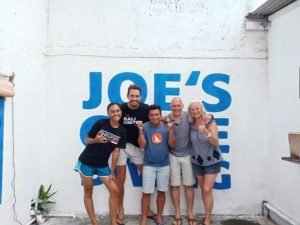
As far as I’m concerned, the Rescue Course is the most educational course I’ve done so far with diving. I also think it’s a really fun course. It feels nice to know what to do in different situations when people are panicking or not breathing anymore. Those who want to take the next step after his / her Advanced I can really recommend everyone to get your Rescue and EFR. You take the information you learn with you for your entire (diving) life. Ismail and Disty, thanks for your great guidance!!
Sorry, the comment form is closed at this time.